Archive for January, 2005

Moen Can Bite My Ass
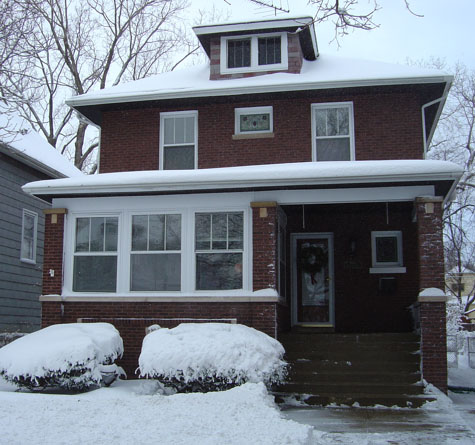
Tuesday, January 18th, 2005

[[This took place on December 23rd, but it’s part of my “catching up” on stories about the house that occurred before and after we moved in.]]

M. had spent the whole day baking cookies (mmmmm… cookies…), so I ran out to pick up dinner while she washed up in the kitchen. I came back, and when I walked in the door, she had that look on her face that just screamed “Something Bad Happened Just Now, And I Don’t Know How Bad It Is, But It’s Bad.” Turns out that when she went under the sink to get something, she found a lake of water.

A little history: When we had the inspection of the house, the kitchen sink was leaking. The owner fixed it before we closed (where “fixed it” means “encased every pipe joint in glops of silicone caulk”), and sure enough, when we moved in, there was no leak down there. However, not everything was right:

  • First, while the hot water worked fine everywhere else in the house, it ran pretty slowly in the kitchen sink.
  • Second, under the sink was a mess of copper tubing where they had hooked in the dishwasher line, and where the copper tube came out of the supply line, it had a bit of a kink in it.
  • Third, just for good measure, the faucet was piped backwards (the cold side was hot and vice versa).

So when a few days before, the hot water in the kitchen slowed even further to a trickle, I bit my lip and wondered when I was going to find the time to do something about it. Well, at least I didn’t have to wonder for too long.

It turns out that it wasn’t the sink leaking at all, it was the faucet. The faucet was a Moen brand faucet–you know the commercial: “Buy it for looks… buy it for life.” Before we moved in, we had a condo with a Moen faucet in the kitchen, and, sure enough, it leaked too! I managed to fix that by getting a new part, but this just put me over the edge. MOEN CAN BITE MY ASS. I AM NEVER BUYING ANOTHER FAUCET FROM THAT COMPANY EVER AGAIN.

This is just great. We’ve got to cook dinner for Christmas Eve, Christmas Day, and start prepping for having 30 people over on Boxing Day. There’s no way we’re going to do this in a kitchen that has no running water.

It’s 9:00PM at this point, but I grab my toolbox and remove not only the faucet, but the mess of copper tubing as well, and I high-tail it down to the Home Depot* while M. watches in atavistic terror, wondering if she’d ever have running water in the kitchen again. I mean, who in their right mind starts a plumbing project at 9:00PM? Me. That’s who.

Arriving at Home Depot, I quickly find a decent Delta faucet and, with the help of a very knowledgeable employee, compose a replacement for the whole copper tubing mess using just two flexible hoses and a tee connector.

I get home by 11:00PM, install the faucet, repipe the hot water under the sink, and not only do we have a non-leaking faucet, but we have glorious glorious hot water pressure in the kitchen! Oh Joy! Oh Rapture!

By Midnight, I was in bed. And Moen can still bite my ass.

* You know you’re a homeowner when you know which Home Depot out of the half-dozen in the city is open til Midnight, and which one is open 24 hours.

Kitchen/Bathroom Before and After Photos

Monday, January 17th, 2005

[[This took place in early-October, but it’s part of my “catching up” on stories about the house that occurred before and after we moved in.]]

As I mentioned many times before here, painting the kitchen was a royal pain in the arse because Behr Autumn Maple covered about as well as orange juice. Oddly enough, the Behr Neptune Blue that we used covered in two coats.

Enough yapping. On to the comparison pics.

More on Vitrolite

Saturday, January 15th, 2005

I mentioned here that the hall bath had likely been redone in the 20’s or 30’s, but according to this article, green Vitrolite wasn’t manufactured until the 30’s. Cool.

Goodbye Pink Tub!

Friday, January 14th, 2005

[[This took place in mid-October, but it’s part of my “catching up” on stories about the house that occurred before and after we moved in.]]

The upstairs hall bath doesn’t have an original bit left in it, however, it does have some rather interesting bits. My best guess combined with some best guesses of a few other people would date the bathroom renovation to the 20’s or 30’s, primarily because the bathroom is encased in green Vitrolite from the floor to about two feet from the ceiling.

Vitrolite is a “pigmented structural glass” that is definitely a bit unusual looking:

Note that the toilet was probably installed in the last 5 years, and the sink seems to have been replaced in the 50’s, and the tile work hails from who-knows when. The tub is a great old cast iron built-in tub, except for one tiny detail. It’s pink:

While we decided that we could wait to replace the toilet and the sink (and eventually, the tile), we wanted to do something about the color of the tub ASAP. Ripping the tub out would have been a gargantuan task, not to mention the fact that it would have required destroying much of the Vitrolite, so we decided to get the tub “re-enameled” white.

The re-enameling process (actually, it’s not enamel at all, but an epoxy) is not only much cheaper than replacing the tub, but can be done by a professional in under half a day. The Tub Guy came out with a roll of tape and a roll of paper and he taped and papered the entire bathroom and most of the hallway to boot. After removing the tub fixtures and taping cups to the faucet and shower head (to catch any drips), he washed the whole tub down with an acid to etch the surface so that the epoxy would bond with it better. Then he sprayed on the epoxy:

He finished his work, cleaned every last bit of mess up, and was gone in about 2 hours. He instructed me not to use the tub until I caulked around it with a good quality silicone caulk, and that I should wait a few days to do the caulking. Since I was so busy with other things, I didn’t get around to caulking the tub until November.

I had heard horror stories about working with silicone caulk–that it was messy and extremely difficult to work with, so I was somewhat reticent to do this job (all of the caulking I’d done in the past was with latex-based caulk, and that cleans up with nothing but water). So after a bit of research, I got my supplies together:

  • 1 Caulk gun
  • 1 Tube of GE Silicone II caulk
  • 1 Roll of blue masking tape
  • 1 latex rubber surgical glove (Super-handy to have around–buy them by the bag!)
  • 1 Roll of paper towel.

I masked off the border of the tub with the blue tape, put the glove on, then caulked each piece of the tub and smoothed the bead with my gloved hand, wiping any excess or mess on a piece of paper towel. After I got all the caulk on and smoothed, I carefully pulled all the tape off, and, holding all the tape and dirty paper towels in my gloved hand, I took the glove off, turning it inside-out so that it encapsulated the tape and paper towel–voila, instant packaged trash. Turns out that it was piece of cake.

Here’s the before and after shots of the caulking job:

And, finally the finished product:

The Old Man and the Snow

Monday, January 10th, 2005

January 6th finished off a 24 hour period with a total of about a foot of snow. Here’s the Old Man under a blanket of snow:

Since snowflakes kind of ‘lock’ together when they blow past each other, you wind up with really cool drifts on the roof like this:

The right side is all banked up, while the left side is doing the whole gravity-defying thing.

But the best thing I saw after the snowstorm was the security lights over the back deck. Because of the way that the snow piled up on top of them, they looked more like an alien than a light fixture.

Attack of the Light Fixtures! Runaway!

Well I didn’t expect a leak there.

Thursday, January 6th, 2005

The basement has two enclosed storage rooms in the front part of it: One is under the front steps, and the other is under the sun room. Both are brick walled with a concrete ceiling, although the one under the stairs has a slanted ceiling and is considerably colder since the stairs are exposed to the elements.

We decided to use the room under the sun room–the bigger of the two–to store dry goods and supplies, while using the smaller, damper, cooler room to store empty boxes, Christmas decorations, wine, and the like.

I thought I’d be clever and put the boxes on a platform out of old milk crates and boards to prevent them from getting water damaged should the basement ever flood. I even went so far as to set the boxes away from the walls too in case the walls should leak. So we’ve got space for water to flood or leak, and plenty of room for air to circulate to prevent things from getting funky.

I did not, however, notice the 3/32″ crack at the back of the top step of the front stairs.

Nor did I plan for the ceiling to leak.

Furthermore, I didn’t think that the melting snow we left on the front steps after the snowstorm would melt and leak all the way through into the storage room.

So imagine my surprise when I went in there to get the boxes for taking down the Christmas decorations and discovered that some of them were wet. Once we figured out what was going on, we pulled the rest of the boxes out of the room, along with a bag of tarps that would have been a lot more useful on top of the boxes.

So once again, we’ve got a basement full of boxes

.

The White Stuff

Wednesday, January 5th, 2005

Early this morning, almost a month after purchasing a snowblower*, we got enough snow for me to use the darned thing. During the day today, we got enough snow for me to use it again! And it’s still snowing! I’ve had my fun now can you please STOP WITH THE SNOWING??

Listen.

I grew up in the South. I never saw snow fall until I move Up North for college. Remember that cheesy claymation Christmas special where Jack Frost touches the windows in the house with his finger and they frost over? I had no idea WHAT IN THE HELL THAT WAS. “Mom, what is that stuff all over the windows? Why aren’t they cleaning it off? Is it permanent? Is it carcinogenic?”

I never had to shovel snow–instead, I got to mow the grass for nine months out of the year. In the middle of the summer, I had to cut it every five days in the raging heat and humidity. To this day, I’d rather saw off my arms than step foot behind a lawnmower, but snow, now that’s different! The novelty of snow still hasn’t worn off, and I don’t mind shoveling or sweeping it, but I, really like blowing it.

So I bought a snowblower.

I’ve discovered that there are a few tricks to buying a snowblower. First, get out and buy it before the first big snowfall. After the first big snowfall, your only choices are going to be the cheepie plastic ones that run on 9 volt batteries, and the $1500 ones that, in addition to removing snow, can also rip up sod, shrubs, and 200 year old redwoods. Second, go to Home Depot and scope out the models that they have. Then spend hours Googling and clicking around Epinions.com to help figure out which brand and model you want. Now once you’ve decided on the one you want (I decided to go with a Toro), if Home Depot carries that model (and in my case, they did), scour the internet for the cheapest price you can find for the snowblower in question. In my case, I found a site that had my snowblower for $129 cheaper than Home Depot. Print out the page in question and bring it to Home Depot–they’ll honor any advertised internet price that’s cheaper than their price.

Back to the snow.

The snowblower works really well–starts immediately and throws the snow REALLY FAR. So far, in fact, that I had to re-do the sidewalk after overshooting the front lawn from the driveway. Heck, I could blow the snow onto your driveway if I wanted to. The real trick is moving snow from the middle section of my driveway, which is wedged between my house and the building next door, to either the front yard or the back yard since I can’t really pile it up anywhere. This entails blowing the snow towards the end of the driveway and then blowing it again onto the front (or back lawn). M. was watching me the whole time with that “Are you done playing?” look. Well, it was fun…

So now it’s off to bed, cause I’m going to have to get up in the morning and displace another six inches of the white stuff. And you know what? I can’t wait.

* Yes I know it’s technically a snow thrower, but it’s just so much easier to say snowblower. Snowblower snowblower snowblower snowblower. See?

New Back Door

Wednesday, January 5th, 2005

[[This took place in early November, but it’s part of my “catching up” on stories about the house that occurred before and after we moved in.]]

The back door is off of the breakfast room, which is a converted porch–off the kitchen. It’s gently insulated, and several of the windows are so out of whack due to settling that they won’t even close anymore.

So back to the back door.

It’s an old wooden door that’s suffered a fair bit of water damage. The top half is a divided-pane window that’s single-pane and rattly and the screen door on the outside has no closer, doesn’t even come close to sealing, and is held shut by an odd piece of bent metal near the very top. Like the basement ceiling, I took one look at it and said “It’s gotta go.”

We bought a new door and a new screen door at Home Depot. After giving them a $30 deposit (non-refundable, of course) and a $330 estimate, they sent out someone to estimate the cost of installation. Our conversation went something like this:

Guy: “Hmm. This is 82″ by 32”–we’re gonna have to get a custom door for this.

Me: “And how much is that?”

Guy: “Extra $150.”

Me: “Can’t we just frame it down and use a stock 80″ by 32″ door?”

Guy: “Uhhhh. Sure. Yeah. I guess so. But you’re still gonna need a custom door cause your door jamb is 6 1/4″ thick instead of 4 1/2″.”

Me: “Why couldn’t you just use a jamb extension kit?” (Which, incidentally, costs $39).

Guy: “Uhhhh. Sure. Yeah. I guess we could do that.

So he takes a bunch of notes and hits the road. Two days later I get a call from Home Depot telling me that the installation for this $175 door (pre-hung in a frame) and the $99 screen door is going to be

<<drumroll>>

$630

I politely told the person on the line that it was extremely unlikely that I would be paying that much for my installation and that they could forget about ever stepping foot in my house again.

I called up my friend J. and he set me up with his wife’s cousin, The Handyman, who’s the son of a general contractor, and apparently is the household equivalent of MacGyver. Due to scheduling difficulties, he can only come 2 days after we move in–the day that I leave for a week long business trip, so I get our nephew S. to come over and help him install the door. I swear that this trip was planned months ago. Really. Stop smirking, I mean it.

So they rip out the old door, to discover that under the door is… well… nothing. The wood under the door had just rotted away entirely, leaving a big gaping hole. So S. and The Handyman fabricate some framing for the base of the door to sit on, frame down the top, and, after a fair bit of work, get the new door installed, caulked, and fill the rest of the space in the framing with Great Stuff, we now have a new back door. It’s got double pane windows, and seals up just so when you close it. As for Great Stuff, if you own a house and don’t yet have at least one can of it lying around, run out and get some RIGHT NOW. Go ahead, I’ll wait.

The Handyman came back the next weekend to finish putting the outside trim on the door and get the screen door installed, which only took up a few hours, despite the finger-numbing cold weather. As for the screen door installation, I can’t believe that I even considered paying someone to install this thing–it was a total piece of cake. I could have done it myself. If you ever need a new screen door, and you’re not a complete hazard with a toolbox, I strongly recommend installing it yourself.

The inside trim of the back door is new, just like the rest of the trim in the breakfast room–it looks like it was installed in the last year. The finish is poorly applied, and judging by the dozens of nails we had snip off of it, it was installed by someone who enjoyed using a nailgun. Lastly, it’s all red oak, when every last bit of trim in the rest of the house is white oak. Of course.

*sigh*

Over the course of the last few weeks, I sanded the old finish off the trim, filled the nail holes and finished it with a few coats of Tung Oil. I managed to find a can of Hope’s Tung Oil at The Local Neighborhood Paint store, and it’s a fantastic finish. After encountering several different brands of “Tung Oil Finish”, each of which contained remarkably little tung oil, this stuff was amazing–it was like fine maple syrup and left a beautiful finish. I rubbed it down with 0000 steel wool and put on a second coat, which I also rubbed with steel wool. After nailing it back up (and making a trip to the hardware store to buy the right length nails), countersinking the nails, and puttying the holes, it’s the best looking trim in the breakfast room. Not that that’s saying anything–the rest of the trim looks like crap.

Next story from the archives: When Crappy Faucets Go Bad!