Archive for the 'Demolition' Category

The Sweet Sound of Insulation

Monday, February 25th, 2008

I haven’t blogged anything about this yet, but M. and I spent November and December gathering quotes from various insulation contractors. The Old Man has somehow survived 96 years with pretty much zero insulation, and after our energy audit we got this fall (which we failed *miserably* I might add), we decided it was time to act.

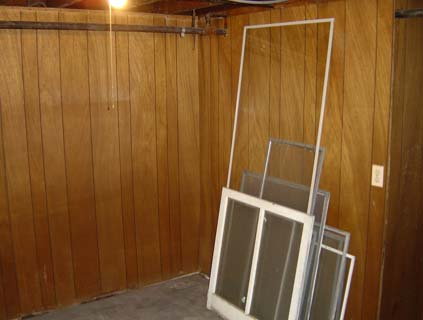
We started with installers who did blown fiberglass but after some research realized that that was pointless. We found a contractor who did sprayed cellulose, but not only could he not spray the ceiling of our attic (the roof deck), but his quote was *ludicrously* high–on the order of 10 times the cost of the fiberglass. We finally found an insulation contractor who deals exclusively in sprayed polyester foam–both closed and open cell. and decided to pull the trigger on January 10th, but it took us another five weeks of work to prepare for them. Attic work included clearing old storm windows and doors out of the attic, disassembling and removing the Big Red Fan of Death (A truly sad day indeed!). Basement prep included removing the perimeter wall of concrete block in the front of the basement (more on that in a separate post), the old unused bathroom walls in the basement, the old panelled wall behind the washer and dryer, and finally, moving all of our storage and stuff away from the basement walls so that they could have access for injecting the foam insulation.

After some discussion and research, we decided to go with 5″ of closed cell foam in the attic (hooray for 2x6s) and 3.5″ of open cell foam in the basement walls in an effort to seal up the balloon framing from pouring cold air from the outside walls of the house into the basement, which keeps it a frigid 12-20 degrees cooler than the first floor (and makes for some cold toes when you’re roaming around the first floor).

So today, we had the attic insulated. I cannot believe that we’ve lived here for three years without having this done. Our thermostat is set at 67 as I type this, and this usually resulted (in sub-freezing weather) in a cool second floor, a chilled first floor, and an attic that was about 30 degrees above the outside temperature (which meant that we were leaking a *ton* of heating into the outside air). We could have turned the heat up higher to keep the house comfy, but that would have been a colossal waste of energy.

In our post insulation world, the attic is 69 degrees, the second floor is 68, and the first floor is 67… and the entire house (with the exception of the breakfast room, which is a 1960’s addition off of the kitchen over a crawl space) is cozy. I can’t even begin to explain how awesome it is.

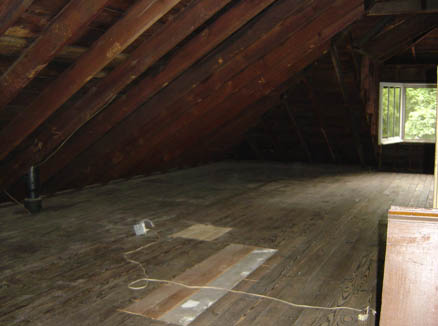
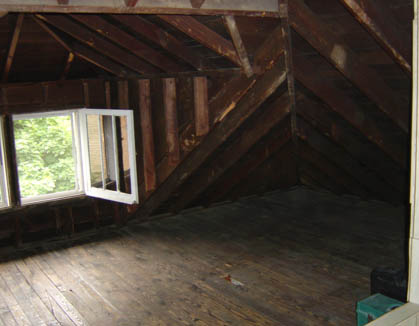
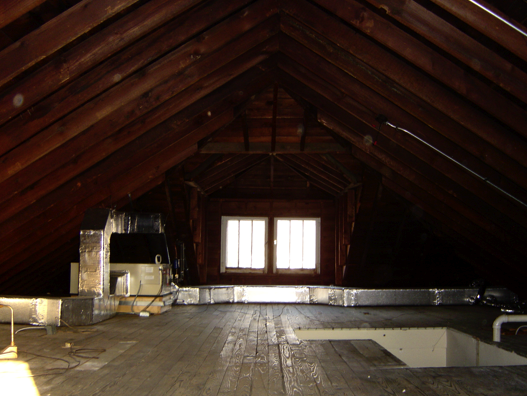
But enough blathering. Here are two pics before (looking dull and gloomy):
and after, looking like a poorly stuccoed Swiss Chalet:
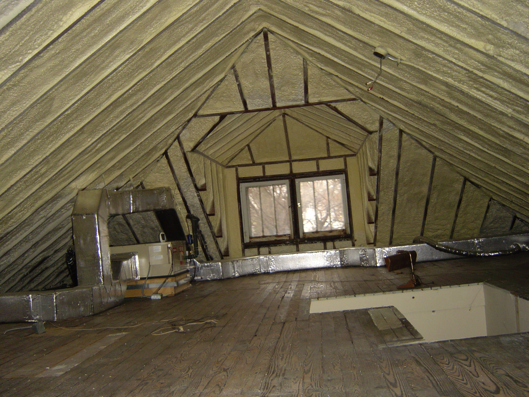
It’s beautiful, isn’t it? And one extra bonus: the house is even quieter than it used to be. Lovely. Worth every penny. I’ll try and get more pics (and some video of the insulation going up!) posted soon.

Empty Spaces

Monday, May 30th, 2005

I spent today putting the finishing touches on the attic in preparation for getting the air conditioning installed. After perforating my skull on yet another protruding nail, I took the time to pull hundreds of panelling nails out of the rafters. I then set to work pulling up the two pieces of carpet, one of which was attached to the floor with wire nails.

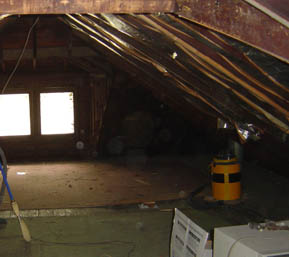
With all the big stuff out of the attic, it was time to tend to the dust, dirt, bits of wood, nails, peanut shells (from squirrels that apparently lived there before we moved in) and general crud that covered the attic floor from one end to the other. We’re talking about 50+ years of filth. To give you an idea of just how filthy it was, here’s a before and after picture of the rear attic windows:

And now, on to the cleaning. Supplies included:

  • 1 Shop VAC
  • 1 Shop VAC HEPA filter
  • 1 2.5″ Shop VAC hose
  • 1 pr. gloves
  • 1 set of grubby-old clothes
  • 1 old hat
  • 1 pr. safety glasses
  • 1 pr. ear plugs

I basically started in the Northeast corner of the attic, worked my way South, and then West. After a while I achieved a zen-like calm as my mind wandered farther and farther away from the mindless task at hand. M. made me lovely lunch which I ate in the backyard because I was so covered in dirt I was sure I’d destroy the kitchen–when I first came down from the attic, I looked like I’d been rolling around in a coal mine.

It took over 6 hours to finish cleaning (including the time pulling all the nails and disposing of the carpet), but this is what the attic looks like now:

You can even see where some previous owners cut holes in the floor for one reason or other (See the before pictures for comparison). While the floor is for the most part sound, before we finish the attic (in a few years), we’re either going to have to replace the entire floor or put a layer of plywood over it.

So we’re now officially ready for the AC guys to install. Woohoo!

Songs in the Attic

Sunday, April 24th, 2005

We’re really lucky to have a walk-up attic in The Old Man. It has its own door off the second floor hallway, and the stairway up has got plenty of height to it. The attic itself is about 8 feet at the peak, and tapers down to the floor on the North and South sides and the East and West sides have dormers with double casement windows. The Long Term Plan is to dormer up one side and make it into finished living space (essentially, another bedroom or study).

The attic is the sole area of the house that we’ve left untouched since we bought the house. We don’t really need it for storage or living space at the moment, so we’ve closed the attic door and concentrated on working on the rest of the house.

Now that we’ve started getting quotes for central air-conditioning, we have to get the attic into a state suitable for the A/C contractors to work in, and as with most everything else in The Old Man, that means demolition.

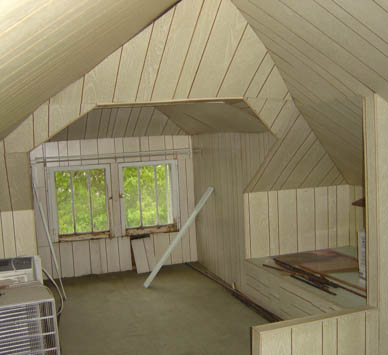
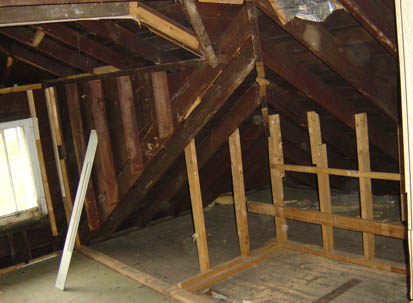
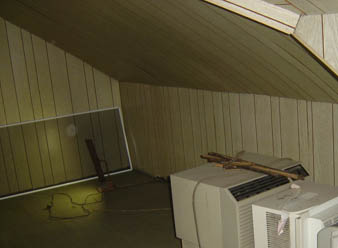
At some point in the past–I’d have to guess the early 70’s–one of the previous owners built a room in the attic. This room basically consists of some amount of R14 fiberglass insulation, furring strips, studs, and liberal amounts of lime green panelling. The construction included two built-in platforms that seem about the right size to hold single beds. Lastly, there is an enclosure built over the stairwell to contain The Big Red Fan of Death (more on that in a later post). This left a small amount of unfinished space in the back of the attic (accessible through a door, also covered in green panelling). The windows in the back part of the attic have fixed masonite louvers on them (outside), presumably to behave as an outtake for The Big Red Fan of Death when it was running.

So this Saturday, our nephew S. and I headed up into the attic with tools and the Shop-Vac and started ripping everything (except for the fan) out. We vacuumed a corner of the unfinished part of the attic and stacked the old storm windows and french doors there while we started tearing everything else out. We pulled down sheet after sheet of panelling, knocked down the studs one at a time, and pulled out strips of insulation. After about 4 hours, we had a tremendous pile of garbage in the back of the attic and had finished about 3/4 of the demolition work. We now had to get all of this out to the alley and into the garbage.

Looking towards the front, before and after.

We had two choices for getting the trash out: Make dozens of trips down through the house with armloads of dusty dirty wood and panelling, or chuck everything out the window and into the backyard.

I’ll give you one guess as to which one we picked.

We tore the louvers out of the back attic windows, and this gave us a clear path to the backyard. While we took turns throwing 2×4’s, furring strips, and bits of insulation out into the yard, we couldn’t toss the panelling out for fear that it would take wind and fly back into the house or even worse, into the neighbor’s yard.

Looking towards the back, before and after.

So I went down onto the roof over the breakfast room and S. handed me the sheets of panelling and I dropped them down into the backyard one at a time. After that, it was just a matter of picking everything up out of the yard (and replacing some king-size divots!) and getting it out to the alley. All told, the cleanup only took about 50 minutes.

So we’ve still got a bit of work to do before we’ll have a totally empty attic, but we got a lot more done in five hours than I thought we would.

Now where’s that bottle of Advil again?

Further Misadventures in the Basement

Sunday, October 31st, 2004

After being out of town for a week, I thought I was ready to tackle the basement again. Well, little did I know that the basement was ready for me–just lying in wait.

I started off by running through the rafters in the back half of the basement with the Shop-Vac. This was the same drill that I did in the front half of the basement a few weeks ago:

  • Strap on my trusty respirator and a pair of goggles.
  • Attach the hose to the outtake of the vacuum–basically creating a huge concentrated air blower.
  • Run the hose over every crack and crevice in the ceiling at point blank range.
  • Watch the tons of dust and crap that come falling out of the rafters.

I don’t know for sure what it was that came out of the ceiling boards–it’s mostly fine white powder and some white grainy stuff, but M. suspects that it’s the plaster dust from when the original plaster basement ceiling was demolished years ago.

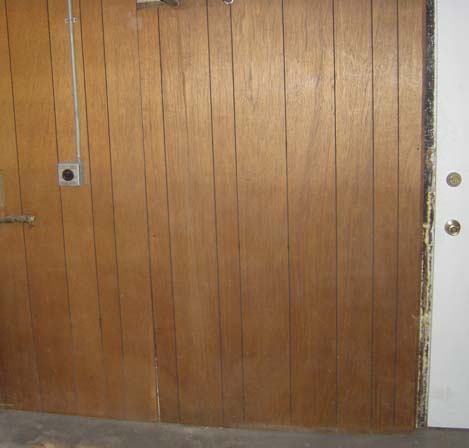
Back to the basement bathroom. While I finished ripping out the bottom bits of that, I decided to take some time to rip out the panelling on the North wall of the basement, West of the bathroom. This turned out to be an adventure, but in the end, it yielded only small surprises.

So we started with something like this:

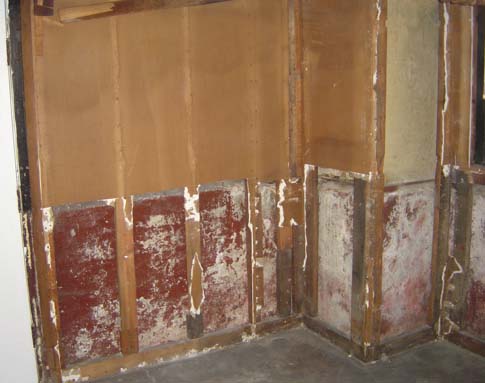
Your typical panelled room, right? Removing the panelling revealed sheetrock over some simple framing. Here’s what that looked like (with some of the sheetrock already removed).

And after I removed the sheetrock and some of the framing, I was left with the original basement wall:

That’s the original foundation, which exhibits some small cracks as well as signs of efflorescence (not as bad as I expected), and the original plaster wall above (which has a small bit of water damage at the bottom). So the foundation along here (and presumably the rest of the North wall) is going to need some patching and some painting, but only after we rip out the driveway, expose the foundation, and seal and repair the outside first. From what I’ve been told, just fixing the inside is only going to hide the problem.

Breaking the Mold

Thursday, October 21st, 2004

Tonight, M. took scrub brush, squeegee, bleach, and Pine Sol to the front storage areas in the basement (under the front steps and the sun porch). Looking at the floors, you’d guess they were pretty clean, but after seeing the black water in her bucket, you might want to revise that guess.

While she took on the storage rooms, I donned a a full-on respirator and neoprene gloves and took on the mold in the bathroom.

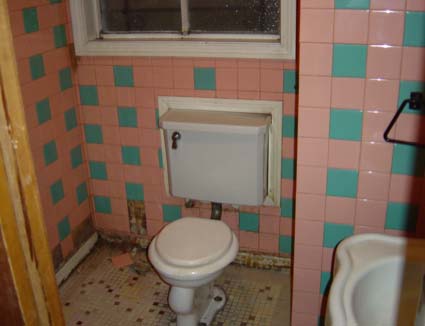
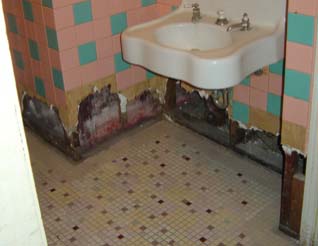
Here’s what it looked like when I started:

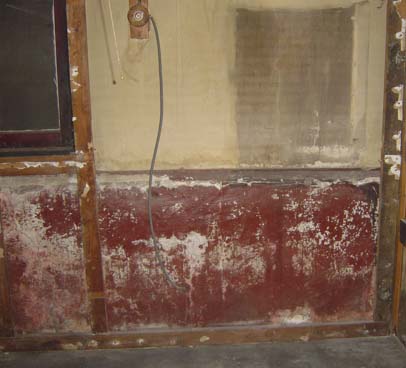
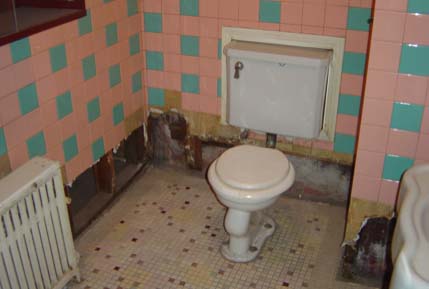
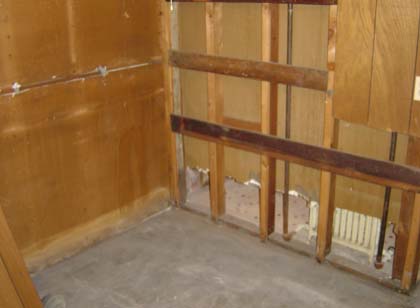
I started by prying the tiles off of the wall near the floor behind the toilet. I worked my way upward until I found no more mold, and then removed another two rows just for good measure–this took me to about 18 inches off the floor. Then I ripped out the sheetrock as well–near the floor it was so soft that it just crumbled off in my fingers, as did the baseboard and the boards that it was nailed to. This area was obviously really badly damaged. I worked my way around the bathroom in this manner, and after filling three contractors garbage bags (which are pricey, but totally, worth it), I was pretty much done. Here’s what it looked like when I was done:

So I’ve finished the job for now (getting the moldy bits out), but the rest of the bathroom has to go eventually since a) I don’t want a bathroom here and b) the bottom of the framing is rotten.

The entire area that I had just demolished was bone dry–M. and I both agreed that the moldy sheetrock and the beetly wood (remember the wood beetles) was damaged a long time ago. It looks like the basement has been dry for a while (well, at least 4 or 5 months I’d guess).

At the advice of several websites, I didn’t use any water or bleach or anything in the cleanup–I did it all dry, and swept up afterward with a small brush and some sweeping compound (another awesome thing to have around when you have a basement). I’m guessing that using water (even if it’s in a bleach solution) may possibly cause the mold to spore and spread around the basement. I don’t know for sure, but eventually, I’ll be carefully sweeping the area again and give it the bleach treatment once I get the rest of the wood out of there–when I’m done I don’t want anything but concrete left.

M. just finished scrubbing the storage rooms, and wow can you tell the difference! I’ve mentioned before that I’m not a fan of finished basements–I firmly believe that a basement should be a storage area and work area. Just because it’s not finished doesn’t mean it’s gotta be a dusty catacomb. 🙂 We’ll get the rest of the basement scrubbed before moving in ’cause I don’t want to be tracking that dirt into the house. Ick.

Was That Really Necessary?

Wednesday, September 29th, 2004

At some point in The Past, some resident of the house decided that they wanted a telephone jack near the radiator in the living room, and this particular radiator is in the back of the living room, which is near the front of the house. You may recall that the front of the basement had a drop-ceiling in it, so noodling up between the outside walls to put a jack in wasn’t really possible without messing up the lovely basement drop ceiling. So this person decided that the right thing to do was to:

  • Drill a hole in the floor in the front of the living room a full inch from the baseboard.
  • Staple bell wire aaaaaaaaaalllllllllll the way along the baseboard to the back of the room.
  • Screw a phone jack into the baseboard using 1.5″ wood screws.

Bell wire, jack, and screws are now resting comfortably in the bottom of the garbage can.

Basement Liberation

Saturday, September 25th, 2004

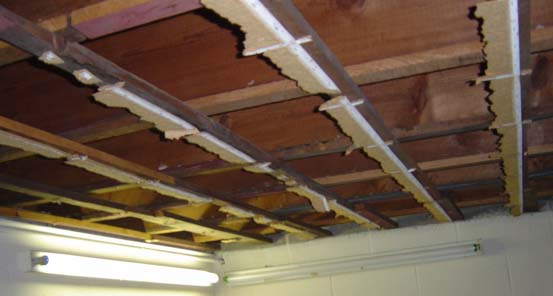
The first time I saw the Old Man, I went inside the basement, took one look at the half-broken drop ceiling in there and realized that it had to go.

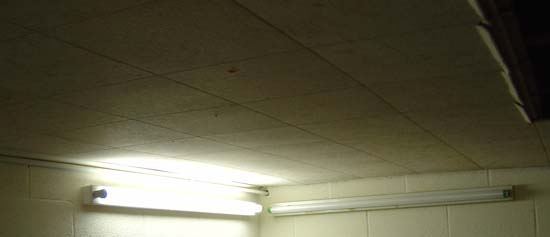
It’s the standard 12″ x 12″ cardboard-type acoustic tiles, and the front half of the basement (the “Concrete Block Room”) was covered with them, with the exception of a few spots where they had been torn out to run new plumbing lines.

This left us with about 6’8″ of height in the basement, with the exception being the steel i-beam that runs from the front to the back of the house… the bottom of the beam is only about 6’6″ from the floor.

Above the tiles were furring strips. Above those furring strips were more furring strips, and on one side of the basement, even *more* furring strips… but I’m getting ahead of myself.

I went and picked up my nephew, S., to help me out. We got to the house and went straight to work in the basement. We each took a hammer and a wrecking bar and made short work of the furring strips in the front of the basement. Granted, we were slowed down by the fact that the furring strips were 32″ or shorter, and each strip was held in place with anywhere from 3 to 8 nails.

In the end we were left with a 5′ high pile of furring strips (with lots of nails sticking out) and some very sore arms (at least my arms were sore… S. seemed just fine)

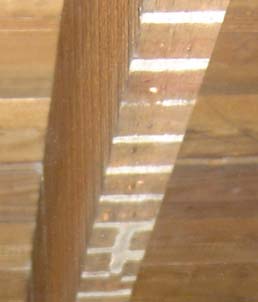
It turned out that under all of those tiles and furring strips were some *gorgeous* rafters. We’ve got 24′ 2×10’s, and since they’ve been covered by a ceiling pretty much since the house was built, they look brand new and don’t exhibit any of the oxidizing that you’d expect to see in a 92 year old house. At some point in the distant past, there was a plaster ceiling, as the bottoms of the rafters exhibit the tell-tale white lines running across them:

Anyway, I’ll try and remember to take an “after” photo, but for now, here’s a “before” photo

and a “during” photo

In the back of the basement, only about 1/4 of the ceiling had tiles left, and instead of furring strips, they used 1×6’s, so it only took about 20 minutes to tear all that out. However, it took quite a boring while to bend nails into the furring strips and stuff them into garbage cans–we got about 2/3 of the strips disposed of.

Further Basement Adventures

Saturday, September 25th, 2004

The phone that was in the rafters has now been hung from a rafter, so we’ve got a permanent corded phone in the basement.

We discovered that the ceiling not only hid the beautiful rafters, but also some of the most dangerous-looking wiring I’ve ever seen. Looking into my crystal ball, I see a fair amount of rewiring in my future.

The back part of the basement has some old panelling (in 4’x8′ sheets). I’ve decided to leave this be for now, but I had to pull a sheet off to get one of the ceiling boards down, and behind the panelling I found, Surprise! A row of furring strips! Behind that, the lower half of the wall was actual cement covered foundation, and the upper half was a plaster wall, which, aside from being covered in a ton of cobwebs and dust, seemed to be in pretty good shape. I punted and tacked the panel back into place for now… I can’t afford to get started on that project now.

We went to Home Depot and picked up a few porcelain light fixtures (the cheepie kind that screw right into a junction box) and S. installed them in place of the suspended ceiling light boxes while I banged away at the nails in the furring strips.

To top off the day, we pulled the two window ACs and put them in the attic, and the we pulled all eight radiator covers and put them in the basement in anticipation of the floor refinishers starting on Wednesday.

And now it’s time for a few bottles of Ibuprofen.