Inspiration

September 20th, 2006

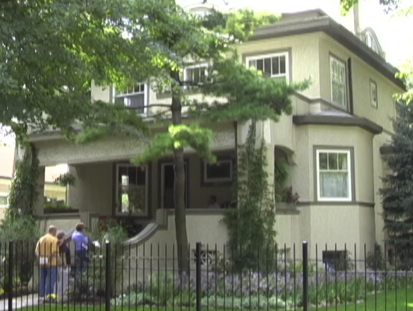
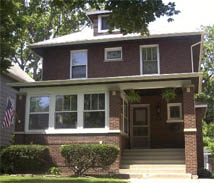
Our neighborhood had their biennial house walk last weekend and I was more than glad to check out the insides of some of the most beautiful homes that I walk and drive by on a regular basis. I drew a lot of inspiration from these beauties while realizing just how much work we’ve got left before we can get there. Here’s a few pictures (they kindly asked us not to take photos inside):

The first house was by far the most stunning. It was a crack house for most of the 90’s but the current owners have meticulously restored it. They’ve done some amazing work by finishing the attic and the basement (even though I’m not a fan of finished basements, this one is quite impressive). The owner even designed the master suite in the attic himself. Amazing!

This house is by far the most beautiful from the outside. The first floor is impeccably restored with period wallpapers and gorgeous woodwork. Truely gorgeous, and on the National Register to boot!

Last, but not least, this somewhat unassuming facade masks one of the most gorgeous prairie/arts & crafts homes I’ve ever stepped foot in. Featuring 36 stained glass windows, gorgeous oak and cherry woodwork, and built-ins that would make you cry, this was my favorite as far as historical preservation goes. This house has 99% of its original trappings.

The End

Scrape and Prime

September 19th, 2006

After repairing the stained glass windows last fall, I was supposed to prime the glazing on the three windows that they pulled out sans frames. Due to a crazed travel schedule, I just got to it this weekend. It was a small task, but required that I get up 15 feet on a ladder to reach the window in the living room, and while I was up there I spent about 45 minutes cleaning the stained glass of years of paint, old glazing, and dirt. The work was much more quantitative than qualitative–that is, scraping big hunks of junk instead of lightly scrubbing with a toothbrush. In any case, the glazing is covered, and the window looks a fair bit better. The window on the front porch was a fair bit easier since it’s at eye-level.
I’ve still got one of the living room windows to go, but it felt so wonderful to finally do something for the Old Man! I’ve got a few more little fix-it things to do this fall, but I feel like I’m getting back into the swing of things. At least I hope–l thought I was back in the saddle this spring, but I was clearly fooling myself.
I’ve been following Casa Decrepit, Chicago Two-Flat, and, of course, the indefatigable Petch House
all summer, and boy do I ever feel like a slacker!

The End

Birdfeeder Photos

June 5th, 2006

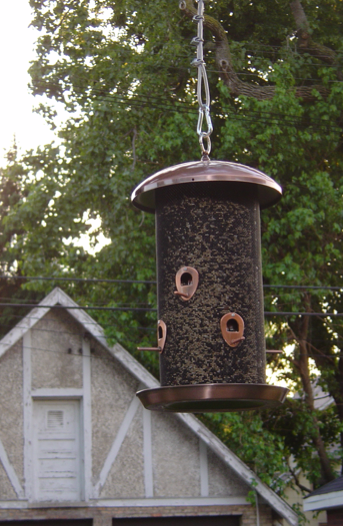
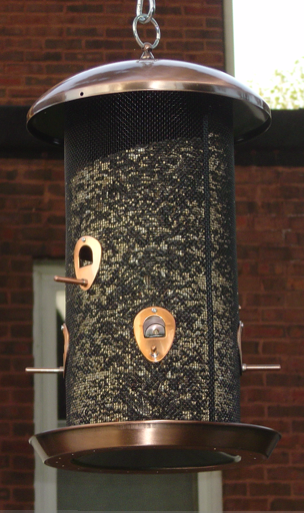
Here are the pictures of the birdfeeder that I hung over the weekend. Unfortunately, the birds didn’t want to hang around to get their picture taken.

Feeder

Feeder

The End

Caterer to the Avian World

June 4th, 2006

I had tons of stuff to do around the Old Man this weekend, so of course, I blew it all off and decided to put up a bird feeder in the backyard.

I started my adventures by visiting the local pet store, which had a single plastic cheapo bird feeder. Disappointed, I headed over to “PetSmart”–my first ever visit to a huge big-box pet superstore, and I have to confess that I was a bit freaked out by the gargantan selection of stuff that people can blow cash on for pets.

I joined the fray by buying an 18″ tall Stokes Giant Combo Bird Feeder, which I thought would look quite pretty in our yard, along with a 30 pound bag of birdseed. But when I asked a salesperson about something to hang the feeder I got nothing more than a dull stare and a mumbled “Idontthinkwesellthatstuff”. Not to be deterred, I just whipped throught the Home Depot on my way back to the Old Man and bought a 7 foot tall “Shepherd’s Hook” to hang the feeder on.

I got home, stuck the hook into the ground at the edge of the back patio, hung the feeder on and realized that I had a problem. The “crook” of the hook stood about 5’8″ off the ground. That means that the feeder itself stood whopping 4’2″ off the ground, which made it more than easily accessible to the dozen or so squirrels that frequent our backyard. On top of that, the feeder weighs probably 5 pounds empty and holds 12 pounds of seed, and that resulted in one very wobbly shepherds hook. The whole thing looked kind of silly, actually.

I decided that The Right Way to do this was to hang the feeder from one of the tree branches. This would place the feeder at the edge of the patio (good), over 10 feet from the tree (better), and more than 15 feet from the house (best). I figured that this would allow me to hang the feeder at least eight feet off the ground.

The biggest problem that I faced was the fact that the tree branch in question was about 30 feet off the ground, and how was I going to get a loop of cable over it? Before going to the hardware store and buying the equipment I needed, I decided to do a proof of concept test and see if I could get some string over the branch somehow. Despite the fact that I’m a lousy throw, I managed to get a ball of string over the branch in 4 tries. I needed to figure out how much cable to buy, so I marked the string at eye level, tied a knot into it, and pulled the knot up to the branch. I made another mark on the string and then measured the length: 26 feet, so I needed to purchase 54 feet of cable (tossing in an extra two feet for good measure).

so I headed to the hardware store to buy:

  • 54 feet of 18″ coated cable.
  • 1 foot of 3/4″ heater hose
  • 1 small carabiner
  • pack of 3 1/8″ wire rope clips
  • pack of 2 3/16″ wire rope clips

I came home and laid the cable out in a long U and found the midpoint of the cable. I cut the heater hose in half, and cut a strip out of one half of the length of the hose–this allowed me to stuff the cut hose inside of the uncut hose, giving me a double thickness hose to use as a saddle over the branch. I threaded the cable through my modified hose to the midpoint and taped it on with duct tape (just to hold it until I got the cable mounted on the branch). I then taped one end of the cable to one end of the string that still dangled from the branch and pulled the cable up and over the branch. A little fiddling gave me my cable hanging from the branch above with the hose saddle on top of the branch.

I got out my big ladder, climbed up and about 9′ off the ground created a loop on one end of the cable by binding it to itself with the three 1/8″ rope clips. I then bound that end of the cable to the dangling end of the cable with the 3/16″ rope clips and tightened the clips as far as they would go with my socket wrench. The only thing left was to cut the extra cable off, and since I had no wire cutters that would work through a 1/8″ stranded steel cable, I pulled out my Dremel tool and a few cut-off wheels and sawed off the excess cable. Ten pounds of birdseed later and I had the feeder hanging. I’m really happy with the way it looks, and since it’s so high off the ground, it’s just the right height for birdwatching from the breakfast room. Sunday morning during breakfast, we saw some of our local finches helping themselves to the feed, and although a number of them seemed somewhat leery of the new feeder, the local cardinals knew just what to do. I’ll try and post a picture sometime this week.
Now one of the reasons I hung the feeder as high as I did is that I’m hoping to discourage the squirrels from trying to eat the birdseed. Given the height off the ground and the distance from the tree, I don’t see how a squirrel could jump to it–if it missed its target, it would surely break its neck when it hit the ground. Their only real chance is to make their way down the cable somehow. I know from several friends that there’s no way to create a totally squirrel-proof bird feeder, but since our next-door neighbor feeds the squirrels several handfuls of peanuts everyday, I’m hoping that that keeps them fat and happy and content to not muck about with my birdfeeder. In any case, given how overengineered my cable is, I could always dispense with the bird feeder and hang a tire swing from it. 🙂

Now about that stuff that I was supposed to be doing this weekend…

The End

I Can’t Believe It’s Not Incandescent!

May 7th, 2006

I hate fluorescent lighting. I mean really hate fluorescent lighting. I’ve often gone off on lengthy rants to my friends and family, blaming fluorescent lights for the evils of the world. My wife, M., has had to endure this ranting numerous times.

So when I told her that I was going to Home Depot this morning to buy two fluorescent lights for my basement workshop, you could have knocked her over with a feather.

What inspired this change in heart? Allow me to ‘splain:

First, when Noel installed fluorescents in the basement of Casa Decrepit, I was inspired to get off my duff and seek out a better lighting solution for my basement workshop.

Second, when my employer moved into a new office 6 months ago, I was surrounded by fluorescent lights, and there wasn’t a switch anywhere to turn them off. I felt totally trapped and immediately began to plot out ways to cover my cubicle with tent material to block out the nasty fluorescent ickiness. However, after a week, I noticed, or more to the point, I didn’t notice any of the three things that I hate about fluorescents:

  1. The annoying 60hz hum
  2. The super annoying flicker
  3. The incredibly annoying and life-sucking “cold” color of the lights

What was it about the fluorescents in my new office that made them different? After doing a little research, I discovered that some advances in fluorescent technology have been made in the past few years that make them suck less. New “electronic” ballasts eliminate the hum and the flicker (and can even be “instant-on”), and newer bulbs emit light that is much closer to the warm yellowy-red light of incandescent bulbs.

Quick note about bulbs: Most fluorescents that you find in office buildings have a color temperature of 4500 degrees which feels cold and weird to me (did I mention that they suck the life out of you? Good. Just checking). The bulbs that I got are rated at a much cozier 3000 degrees. This makes me feel more like I’m in my home and less like I’m in prepping for an alien autopsy.

Anyway.

I went to Home Depot this morning and bought 2 “Lithonia Lighting 1 x 4 Ft. 2-Lamp Fluorescent Shop Lights (T-8)” and 4 T-8 48″ bulbs. It took a only few moments to assemble them, hang them from hooks I put into the subfloor between the rafters, and plug them into the incandescent fixtures’ outlets above my workbench. I plan on hard-wiring them in later, but for now, it’s like daylight in my workshop, and I love my new lights. M. even likes them! She asked me to install one over the washer and dryer in the basement.

And that’s how I came to install fluorescent lights in the basement of The Old Man. Am I ready to install them upstairs in my living area? I wouldn’t go quite that far. Let’s just stick with the basement for now.

The End

Back in the Saddle Again

April 22nd, 2006

After a 12 month marathon, culminating in having the family over for Thanksgiving dinner, we took four months off from working on The Old Man, mostly to save our sanity and keep us from growing to hate The Old Man.
Well, for the first time in four months, we did some work around the house today. The warm weather sent M. out into the yard to do combat with the dandelions growing in the lawn. After clearing out my workshop a few weeks ago, I finally created a bottom shelf for my workbench out of the old plexiglass that was in the front door (more to come in a future post about the new (beautiful!) bevelled glass that we’ve got in the front door). I found some weatherstripping and a door “sweep” when cleaning up in the basement and installed them on the basement door to the yard in the hopes of stemming the pile of leaves that seems to keep blowing under the door and into my workshop.

We’ve put together a plan for what needs to be done this year, and it’s about time that we got started executing on some of the smaller items:

  • Paint the “master” bath and put new accoutrements (mirror, towel bar, shelf etc.) in.
  • Pull the nails off the quarter round that I yanked from the second floor before the floors were refinished. Then reinstall it.
  • Paint the glazing on the repaired stained glass windows
  • Clean the mold out of the storage room
  • Make a screen for the bedroom
  • Finish cleaning the stained glass windows

That’s just a few of the little things we need to get done. Now for the bigger things:

  • Dormer the North side of the attic
  • Install skylights in the attic
  • Get a new roof installed
  • Insulate the new roof

I think that should keep us busy for a while.

The End

Spare Time? What Spare Time?

November 28th, 2005

I’m swamped. In the last three months, I’ve been busy knocking out dozens of small projects around the Old Man:

  • Install a railing on the front steps
  • Clean the stained glass windows (wow, were they filthy)
  • Get the rest of the windows cleaned (ditto on the filthy)
  • Get actual bevelled, tempered glass installed in the front door (to replace the horrid plexiglass that was there when we moved in)
  • Straighten up the basement
  • Clean out the garage so we can park the car in there when it snows
  • Get rid of all the wood chips near the house
  • Caulk a big crack in the front steps
  • Buy and install new blinds for a few windows
  • Make curtains for the breakfast room (M. took care of that)
  • Install curtains in the basement around my workshop so the whole basement doesn’t get dusted when I’m woodworking
  • Numerous tasks related to furnishing the house (upholster chairs, buy rugs, etc)
  • Caulk the windows shut with Seal and Peel (without dying from the fumes)
  • Do Spring Cleaning for the first time
  • Cook and prepare to have my whole family over for Thanksgiving, including several houseguests for a week (which was a blast, if exhausting)

Combined with the fact that work has been crazy busy, I’ve had no time to blog. Hopefully, now that our big family get-together is over, I’ll have some more time to tell a few stories about some of the more interesting activities around the Old Man.

Our plan is to take the month of December off from working on the Old Man and just enjoy him for a bit before we burn ourselves out entirely. It’s really nice to just sit back and enjoy the fruits of our labor.

The End

It Hides a Multitude of Sins

October 25th, 2005

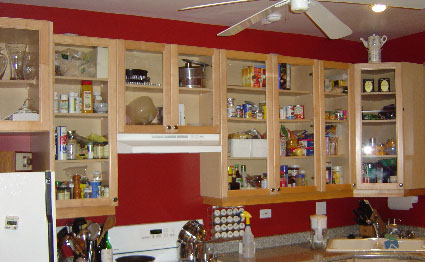
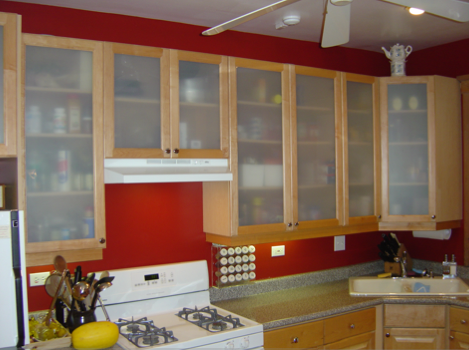
The previous owners of The Old Man put in what I call a “Seller’s Kitchen”: a kitchen whose purpose is primarily to help sell the house. Our kitchen looks nice, but isn’t terribly suited for cooking. In particular, however, once you fill it up full of stuff, it looks rather cluttered since every one of the upper cabinets has a glass door (this picture is from early 2005):


We spent some time investigating ways of opaqueing the doors: Chemical etching was too messy and too hard to get a consistent look. We couldn’t find pieces of nice handmade paper that were 42″ long. After racking our brains for a while, we basically forgot about it and went about our business.

At some point early in 2005, M. discovered Gila film and decided to try coating the window in her bathroom with the “white” (opaque) film–this would allow her to get more light but still have privacy. It worked OK in the bathroom, but because the old window glass wasn’t perfectly smooth, the film shows numerous small (but slightly annoying) imperfections. We shelved the rest of the film and forgot about it until last week.

I brought the remaining film up and coated the two cabinet doors above the refrigerator as a sort of a test run, and since the glass in the kitchen cabinets is new (and consequently, perfectly smooth), it looked fantastic! I ran by my home away from home to pick up another roll, and in a few short days, I managed to opaque every cabinet door except the four doors on the cabinets (not shown) that hold our dishes and glassware (which don’t look particularly cluttered).


I have to confess that I shelled out the eight bucks for the “kit” to apply the film, which consists of a spray bottle of soapy water, a couple of cheap hard plastic “squeegees”, and a small razor cutter. The process for applying the film is pretty simple, but takes a little bit of practice.

First, a couple of don’ts: Don’t use Windex or anything containing ammonia to clean the glass–according to the instructions, ammonia dissolved the glue on the film. Also, while you can lay the glass flat to measure and apply and trim the film, stand it up before squeegeeing so that the excess soapy water can drain off the glass.

Start by cleaning the glass with the soapy solution. Scrape off any paint spatters or whatnot with a razor blade. You basically want your glass to be as smooth and clean as possible.

Now measure the glass and cut a piece of film about 2 or 3 inches wider and longer than your piece of glass. I strongly recommend that you don’t try to cut it too close here or you may wind up starting over like I did. Twice.

Separate the film from its backing by applying two pieces of tape over one corner and then quickly pulling them apart. Remove the backing, spraying the film as you go to counteract the static electricity which will make the film not want to cooperate at all.

Thoroughly spray the back side of the film and the glass itself, then position the film on the glass.

Now spray the other side of the film and squeegee the air bubbles out, starting in the center and going left, then right, stopping about two inches from the edge of the glass. Now trim the excess film off.

Spray the film again with the soapy water and give it a thorough squeegeeing. Now dab the glass dry around the edges and you’re done!

I managed to get 10 cabinet doors done in about four hours and we’re thrilled with our kitchen’s new look.

The End